Don Eilenberger's Suspension Setup


Home ] THE '87 K75S ] K75 Dyno Runs ] '04 R1150RS ] R1100R Dyno Runs ] '07 R1200R Roadster ] [ Suspension Setup ] Car List ] Eilenberger's Laws ]


Suspension Setup

This page is a compilation of some postings I made on the www.r1150r.org forum on suspension setup. I'll be adding a bit to what I posted there, and editing it when needed. It was broken up into several messages - each covering a different section of suspension setup. Comments are welcome!


The first section is setting your "preload" and "sag"

Sag is pretty easy...

Preload is set with everything on the bike that you'd normally ride with. If you ride with saddlebags of rocks - you want the saddlebags of rocks on the bike. You need to take the measurements with the bike AS YOU NORMALLY RIDE IT..

Measuring REAR suspension static sag: This is the height difference between the rear suspension height fully extended, and the rear suspension height with just the weight of the bike (and whatever you normally carry on it).

On the R12R - I found it easy to measure using a tape measure hooked in the hole in the rear axle to one of the bag mounts. It's best if you're measuring at a right angle to the surface of the earth.. horizontally (up-down). The usual technique is to measure the bike on the centerstand and make sure your rear wheel is off the ground (no problem on mine..) then bounce the bike off the centerstand, and having someone help you hold it upright (without putting any downward force on the bike) and measure the same spots. Subtract the bigger from the smaller and that's static sag. On 
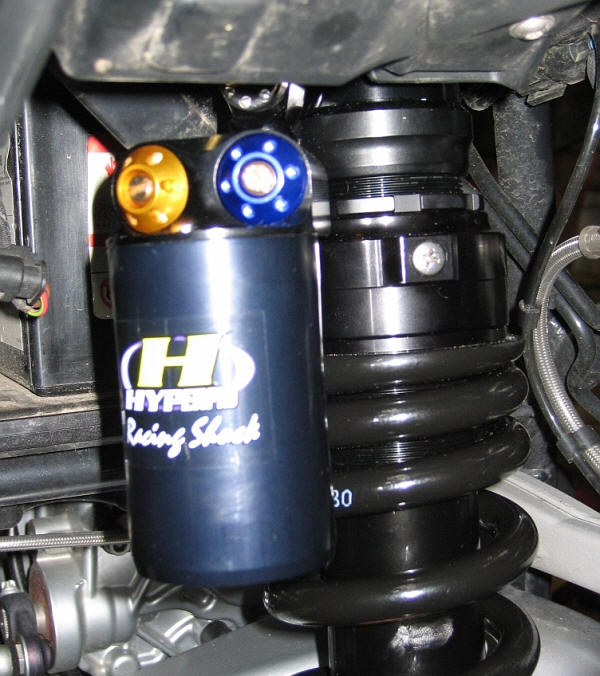
my Hyperpro's they call for 10mm +/- 5mm static sag on a factory spec sheet that came with the shocks.

There are some fancy techniques for getting rid of stiction effects on the measurement if you want to get fussy with it.. this is done on the "on the wheels" measurement (it doesn't make any difference on the unloaded measurement).. that's to first take a measurement after pushing down on the rear and letting it rise on itself. Then you take a second measurement after lifting the rear and letting it settle by itself. You take the average of the 2 numbers (A&B)/2=C as your weighted distance. I wouldn't bother on the roadster - I tried this and there was no measureable difference (sign of a good low-stiction suspension!)

Static sag is a good starting point IF the manufacturer gives you the expected static sag.

On my shocks, they came set from the factory with too much static sag (too little "preload") - the bike sat lower than it should which caused it bottom and hit the rubber bumper on the shaft too often, kicking my butt out of my seat. Increasing the preload in the rear decreased the sag - and it no longer felt harsh. This seems counterintuitive, but sometimes tightening up the spring will make it feel softer. Go figure.. I also put on a few pounds over the past few weeks, and my butt was getting kicked again.. finally dawned on me last night to up the preload a few clicks, and my ride to work was kick-free :-)

The more important measurement is dynamic sag - ie - the compression with your butt in the seat.

With a linear (not progressively wound) spring - the rule of thumb is 1/3rd the total suspension travel = correct dynamic sag. It's a rule of thumb making for a good starting point.. some adjustment up/down is probably going to be necessary, but it will get you very close to where it should be.

NOTE - I said "linear" spring. I got fooled on the Hyperpro's which come with progressive wound springs. A progressive wound spring starts out soft and as it gets compressed gets stiffer. A linear spring, provides linear force throughout it's length (until the coils start touching, aka "coil-bound"). It turns out I needed more dynamic preload (less sag) with the progressively wound spring due to the non-linear characteristics.. I found about 1/4 travel dynamic preload to be workable for the progressively wound springs.. What's interesting - Hyperpro gives no dimension or guide to dynamic, probably because of the progressive nature of the springs. But - I've digressed..

Measuring your REAR suspension dynamic sag - use the first measurement from your static sag [A] - suspension fully extended, then plop your butt on the bike, and just balancing it on your tippie-toes with absolutely as little force on your toes as possible - make the loaded measurement [B].

Do the math (A-B)=C and C is your dynamic sag.

BMW claims 140mm travel on the stock rear suspension (I calculated about 135mm - but they're close..) That is IF the rubber bumper on the shock were fully compressed and the shock went metal to metal. Since that's not going to happen, in reality - the rear has about 120mm of useable travel with the stock suspension. You want the dynamic sag [C] to be ~1/3rd that number, or ~40mm (+/-5mm)


That's the rear - the front is even easier to measure.. you just need a tie-wrap.

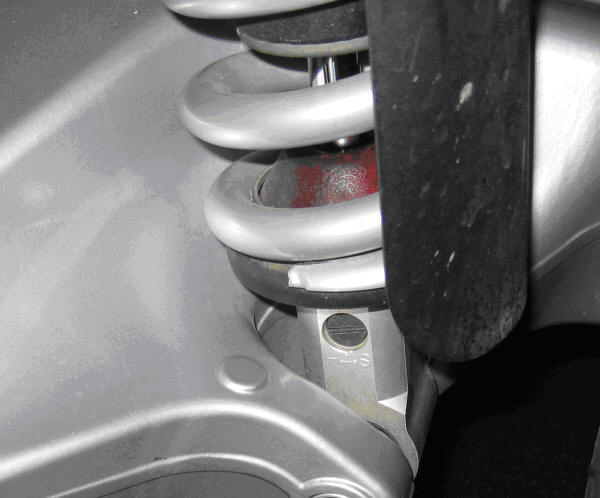
Measuring your FRONT suspension static sag: Put a small tie-wrap snuggly (not tight) around the left fork leg above the slider. Push it down onto the top of the slider-seal so it's just touching. Take the bike gently off the centerstand so it doesn't bounce. The tie-wrap will move up as the suspension compresses. Gently put it back on the centerstand and make sure the front wheel is "unloaded" (press down rear wheel until front is off the ground.)

Measure between the bottom of the tie-wrap and the top of the slider seal. That's your static sag. If your shock manufacturer gave you a measurement for this - it's a useful thing to measure. If they didn't - it's pretty much useless.

Measuring the FRONT dynamic sag: To measure the dynamic sag, gently take it off the centerstand, and gently put your butt on the seat (no bouncing) - again tippie-toe again. Gently get off and put it on the centerstand. Repeat the measurement - the difference between fully extended measurement [A] and the measurement with your butt in the seat [B] is your dynamic (loaded) sag. (A-B)=C again. Usually the dynamic and static sag aren't hugely different on the front end of a Telelever bike since the riders weight is primarily carried on the rear wheel.

To find the total travel of the front suspension - just leave the tie wrap on and go for a vigorous ride on a bumpy road. Put bike on centerstand and repeat the measurement between bottom of tie-wrap and top of fork slider.

I didn't do this on the stock suspension when I had it on - but I asked a friend to on his.. he measured about 104mm (from memory).. with my lowered suspension, I get a total travel measurement of about 85mm (the bike was lowered 20mm.. so it makes sense.)

Once again you want your dynamic (loaded) sag to be ~1/3rd the total travel - or around 35mm +/-5mm for stock suspension. (~1/4 travel for progressive wound springs..)  Do the same (A-B) = C.

That's where you start. If sag isn't set correctly - nothing else will set correctly.

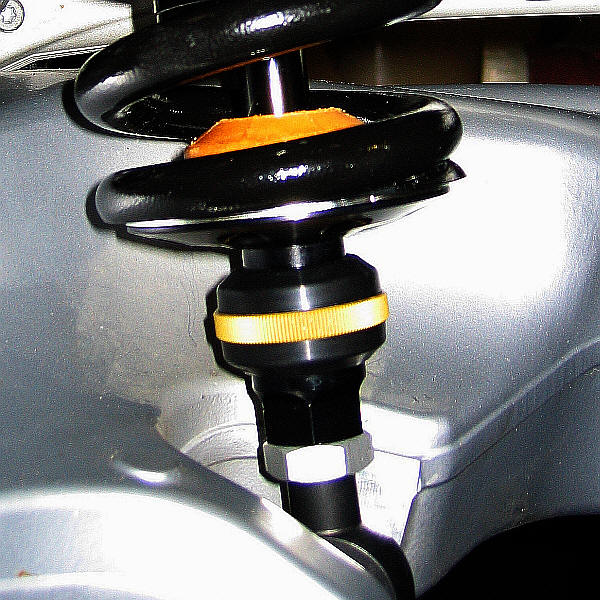
The threaded ring is where you adjust front pre-load (sag) on this Hyperpro aftermarket front shock


DAMPING Adjustments - understanding what they are and what they do:


Compression damping: Pretty much self-explanatory.. it provides control of the resistance the shock has to compressing. While the spring provides most of the force resistance, the damping controls the speed that the compression can happen at. It normally does this by forcing oil through a controlled size passage. The laws of fluid movement end up working here.. to move X fluid in T-time through a fixed size hole requires Y force. To move X*2 (twice the fluid) in T-Time through the same hole will require Y*4 in force.

Simply said: The force required goes up as the square of the SPEED of the movement.

Some shocks have high and low speed compression damping adjustments. (Wilbers, Hyperpro, YSS) These terms mean are a bit confusing - they don't refer to the speed of the bike, they refer to the speed of the movement of the shock, which can be entirely different.

The "high" speed compression damping controls the movement/response of the shock to FAST compression of the shock. An example of a fast-speed compression would be the expansion joints I go over on my way to work. Short fast movement is controlled by the "high-speed" compression damping.

The "low" speed compression damping controls the movement/response of the shock to SLOW compression of the shock. An example of low-speed compression would be the suspension compressing as you enter a corner and weight is put on the suspension due to the force of the cornering. Low speed compression damping prevents the compression from happening too fast.

Other shocks - Ohlins simply have a single compression circuit that controls both high-low speed. While this might seem a compromise - IMHO it's not an awful compromise. While I can feel the difference tweaking the high/low speed settings on Wilbers and Hyperpro shocks, I've also been able to get excellent control and feel on Ohlins shocks with the single adjustment. Even on the shocks with both adjustments - there is an interaction between the high/low speed damping, and Hyperpro recommends that they never be more than a few clicks different in adjustment.

Blue and Gold rings surround the low and high speed compression damping adjustment on a Hyperpro shock


Rebound damping controls the speed the shock extends from a compressed state. If you think of a shock with no rebound damping - going into a corner - the shock would compress and then immediately try to fully extend itself - making for unsettled suspension and a pogo-stick sort of feeling. This is the most common damping adjustment - the BMW stock rear shock has only rebound damping adjustment, for a good reason.. too much can be as bad as too little.

The reason too-much rebound can be bad - is called "stacking up" - where repeated bumps (think washboard surface) compresses the shock, and the excessive rebound damping keeps it from extending.. eventually the shock will be fully compressed and bottoming out. It also can effect how a shock "follows" a single bump (like our usual expansion joint) - if the shock doesn't allow the suspension to unload at the speed the wheel travels over the bump (and down the back side of it) - the rider will feel a thump/kick as the wheel drops off the bump, rather than following the change in profile.


Rebound damping adjustment on a stock R1200R rear shock

Rebound damping adjustment on a Hyperpro aftermarket shock


Suspension setup - final installment (I think..)


Since I covered all the terms, and how to setup your spring preload, I'll try to briefly cover setting the damping on shocks that allow this..

First - you need an afternoon, good weather, plenty of time. You need to check and adjust your tire pressure. Carry the load on the bike you normally carry. And you need a course. I have a loop that I use that has the following features:
 

  • Long straight section

  • Washboard section

  • Pavement cuts - poorly filled

  • Light traffic

  • Safe place to pull over to make adjustments


The loop is about 5 miles in length, and takes me about 8 minutes to do. It has a decent spot to pull off to the side where I can make adjustments without worrying about a car running into me, and it has little traffic usually.

I first start out making 2 loops of my route - just to get the feel of how the suspension now feels and determine what I think could be improved. I'm looking for:
 

  • High speed stability in the straight section - I can hit about 70 on the straight section, not terribly fast, but fast enough to feel if the bike feels "stable" and "planted" at speed

  • Comfortable ride - the washboard section and the pavement cut (badly filled - nice sharp edges about 2' apart) will tell me if the suspension is compliant. The washboard will tell me if the rebound damping is too high and "packing down", the sharp edges will tell me if the compression damping (especially on shocks with two compression adjustments - the high-speed adjustment) is correct.

  • The twisties section tells me if the control feels good - and control is really changed with rebound damping on twisties. Too much rebound and the bike feels wooden and starts to compress and run wide (rake increases), too little and the bike will have an unsettled feeling - not-planted feeling. Too much low-speed compression damping will result in the suspension jacking up, and the bike turning in quicker - again - not-planted feeling.


What do I do to make the adjustments?

IMPORTANT - only adjust one thing at a time. ONE THING. Making more than one adjustment will lead to rampant confusion, I know, I've done it.

First a note on how to make any adjustment:

Start out with a large adjustment so you can FEEL the effect the adjustment has. On compression adjustments, I usually turn the adjuster 3 or 4 clicks higher, which should make a very noticeable difference in feel. Once I make the adjustment, I circle the loop, as many times as needed to be sure I feel exactly what the adjustment did.

IF the adjustment made things feel better (in this case - high-speed compression might make the sharp edge of the pavement cutout feel less sharp) - then I continue making adjustments on that adjuster until things feel worse - and I make smaller (1-2 clicks) adjustments. Once the adjustment starts feeling worse - reverse direction and work back toward where it felt better. Continue in that direction until it feels worse - then reverse again and narrow it down to the single click position that feels "best"..

If your initial big adjustment immediately made it feel worse - go back to where you started - and go for a big adjustment in the other direction. Then work your way in to where it feels best.

Doing ONE adjustment at a time will teach you what adjustments change what feeling in the bike..

In general:

High speed compression - changes sharp shock response, the badly patched pavement-cut with a sharp edge. Too much will shock you, too little feels unstable.

Low speed compression - does the bike feel "planted" - especially in curves? If not - increase low speed compression until it does. Too much low speed compression can make the bike start to hike-up, with the rear suspension jacking upward over undulating pavement, or a series of curves. In that case the bike will start to turn sharper into turns as the rake on the front end is decreased by the rising rear suspension.

Rebound - the washboard section is usually good to adjust this - if the bike seems to "pack down" - compress the rear suspension over the washboard, it will become harsher as you travel through the washboard, it will also become slower to respond on curves (tend to run wide) since the rake is increasing with the lowered rear suspension. Rebound also can cause sharp impacts to feel harsher if the wheel isn't recovering (rebounding) fast enough due to too much rebound. Too little rebound can give a pogo sort of feeling, especially in the twisties section as the suspension loads and unloads.

That's the basics - and using a course, giving yourself plenty of time will give you a chance to learn how the adjustments change the bike. The adjustments DO interact to some degree.. you may find adding more rebound might mean you also need a bit less compression damping..

It's sorta fun to do if you attack it as a puzzle, and do it very methodically. Make ONE adjustment at a time is the biggest rule! Doing otherwise will lead to brain-fog. BTDT.

That's it folks.. if there are any comments or questions - feel free to email me!