Auxiliary LightingBackground:I've always considered auxiliary lighting important - not so much for night riding since I don't do a lot of night riding - but to increase my conspicuity during the day. A triangulated group of lights is much more visible to a motorist than a single headlight (even one that's being modulated) - and hopefully gives them some 3D perspective on the bike - and the speed at which it's approaching them. It seems to really help decreases the left-turn in front of me incidents. So - as soon as I got the Roadster, I started thinking about how I might add lights to it - in a clean and sanitary manner. The bike doesn't lend itself to easily adding lights since there is no fairing. I finally tracked down, and started talking to James Gordy - the manufacturer of LumaLight mounting kits. James suggested that an adaptation of a bracket he made for the R1200GS might be useable on the Roadster and offered me a set to try out. I'd had good results with Hella FF50 lights on other bikes - so I found a set at a reasonable price on EBay. The results are below:
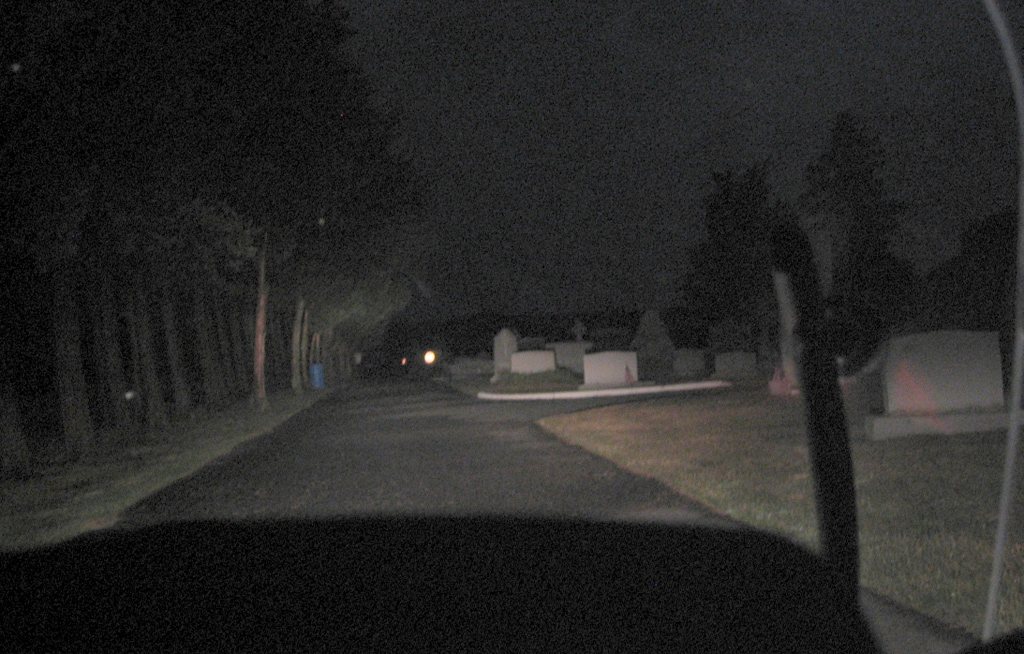
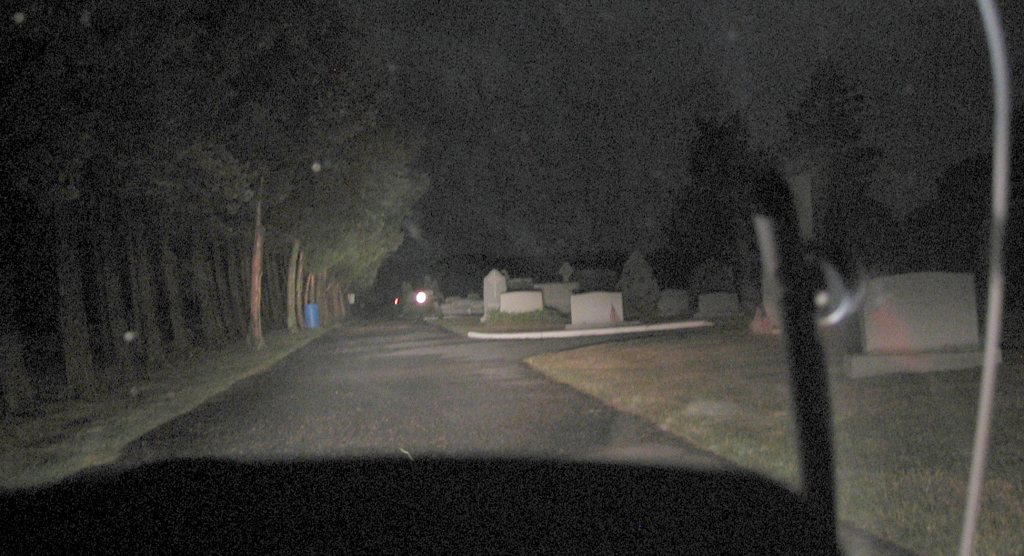
The photos below show the results - taken in my favorite light test course - a local graveyard (the granite markers along the edge of the road are handy for comparing distances.) The orb at the end of the road isn't a spirit - it's a reflective stop sign. There is a second one even further down the road which is clearly seen in the second photo. It was the traditional "dark and rainy night" when I took these - thought it would be a good test since wet pavement doesn't tend to reflect light. I'll let the results speak for themselves:
Highbeam only
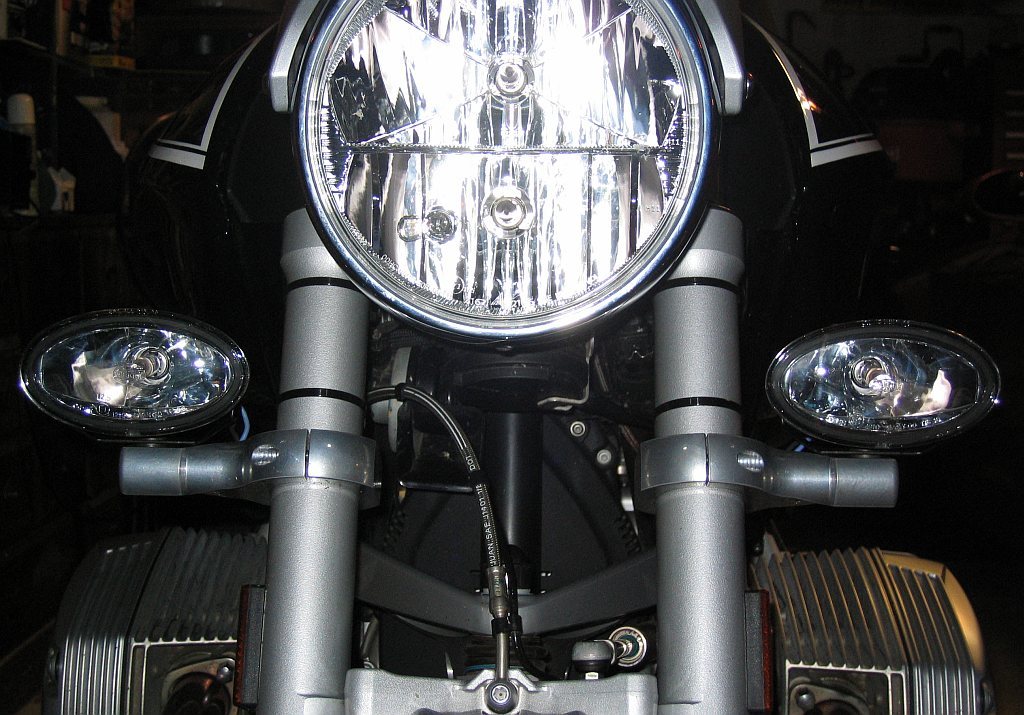
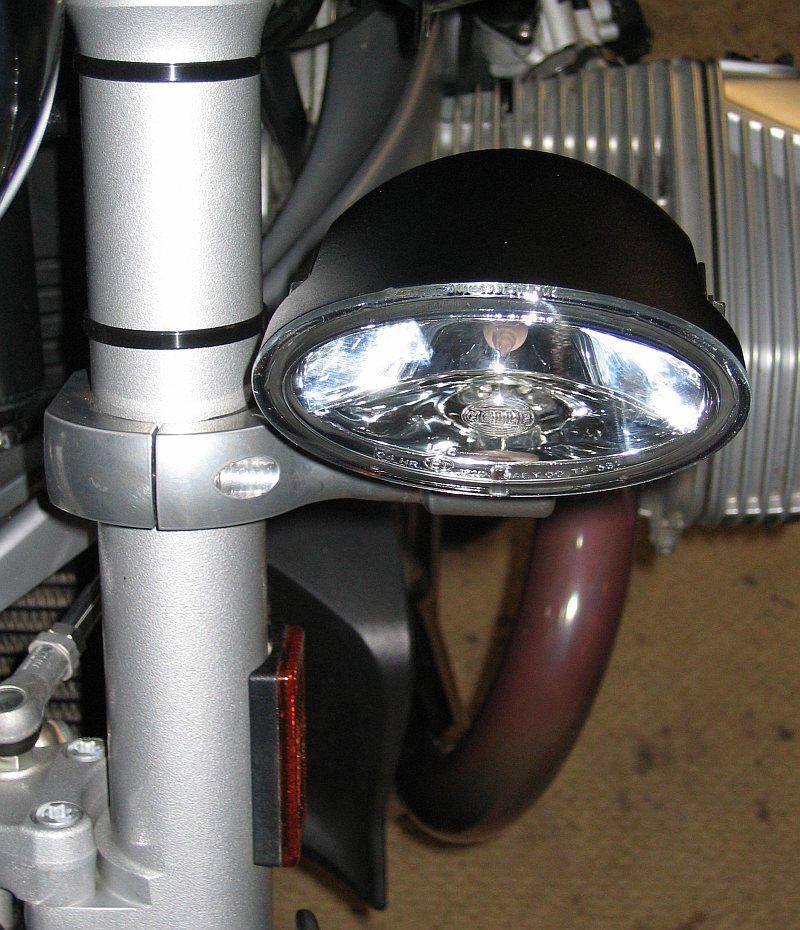
Highbeam and FF50 lights Physically mounting the lights:Mounting the lights required a bit of creativity since the brackets were made for another bike and different lights. The Hella lights come with a bolt normally used going down through the mount - in this case - the bolt would be too short, and the LumaLink mounts were made for an Allen-bolt going up through them. Digging around in my junk drawer - I finally found two Allen-bolts of the perfect length, and some locking nuts that fit the bolts. The clamp part of the bracket was made to fit on a GS fork slider lower down on the tube where the diameters were slightly different. Luckily - some self-adhesive foam tape on the inside of the clamps made for a good secure mount on the R1200R forks. This can be seen in the close-up photo below. The position the lights are mounted was chosen primarily for clearance reasons. Lower than this the clamps would interfere with the wishbone of the telelever assembly. Trying to mount them below the telelever wishbone would have worked - except for the steering damper. The clamp would have interfered with the steering damper at full left lock position. Going higher might be an option for smaller lights - but much higher than this and the lights would hit the fuel tank at full lock. Staying at this height gives good triangulation, and the lights don't drown out the turnsignals. Wiring the lights:The Hella FF50 light kit comes with a wiring harness with a switch and a fused relay assembly. Since it is intended for automotive use - many of the wires are much too long for motorcycle use. It also included plug-in bullet-type connectors from the harness to the lights - at about 6" from the lights themselves. While this would be OK on a car/truck, or a bike with a fairing to hide the connectors and get them out of the weather - it just didn't seem possible to make this look right on the Roadster and have it weatherproof. It would have required the connectors to either be strapped to the back of the fork tube, or to be dangling in thin air. Instead - I decided to splice in some weatherproof wire I had kicking around - making as small a splice as I could and have the splice totally encased in shrink wrap to make it weatherproof. The weatherproof wire had a sheath around it - making for a neat installation, and it was of adequate gauge (14G) that I didn't worry about loosing any voltage due to wire resistance getting to the lights.
Rear view of the light and bracket
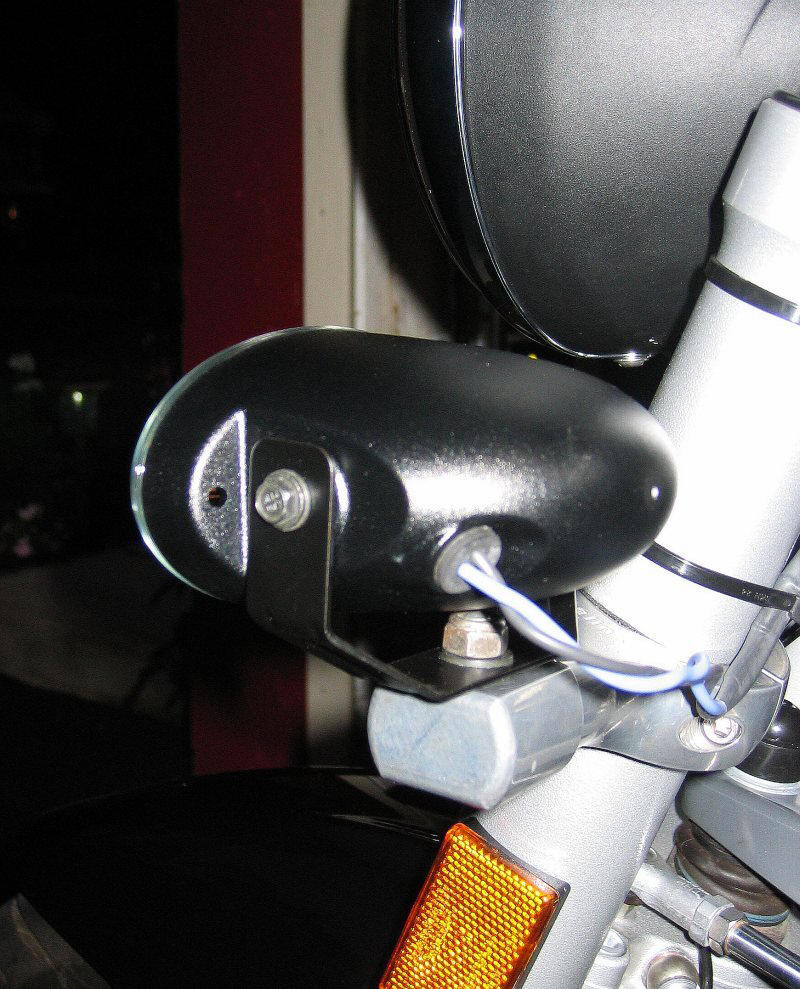
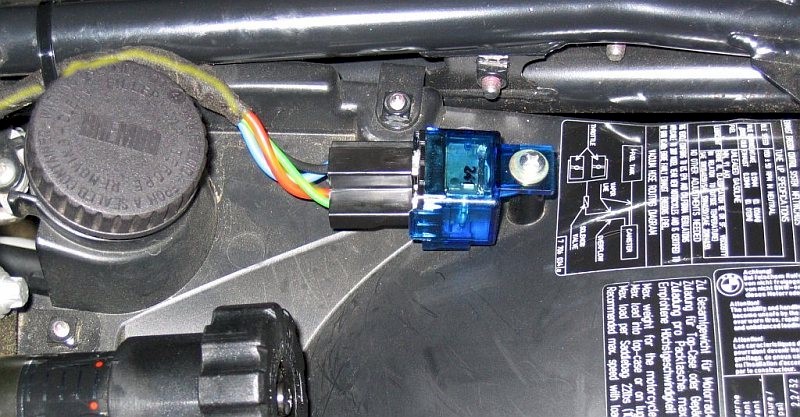
Frontview Closeup Having the lights turn off when the ignition is turned off is important to me since I'm forgetful - and have almost run down a battery by having lights that didn't power off with the bike. Since the bike uses CANBUS technology - there aren't the normal spots to steal switched power. The best spot seems to be the parking light in the headlight. This turns off immediately when the bike is powered off - unlike some other power on the bike which remains on for a time after the bike is powered off. Getting this power required tapping into the wire feeding the parking light and then running that power up to the switch I added on the handlebars for the lights. The output from that switch was then run to the center of the bike under the seat where the relay was going to be located. The two wires from the lights themselves was also routed to the same area under the seat, by going through the wire channel on the steering head (where all the other wires go) and then down along the left side of the bike under the plastic trim panels
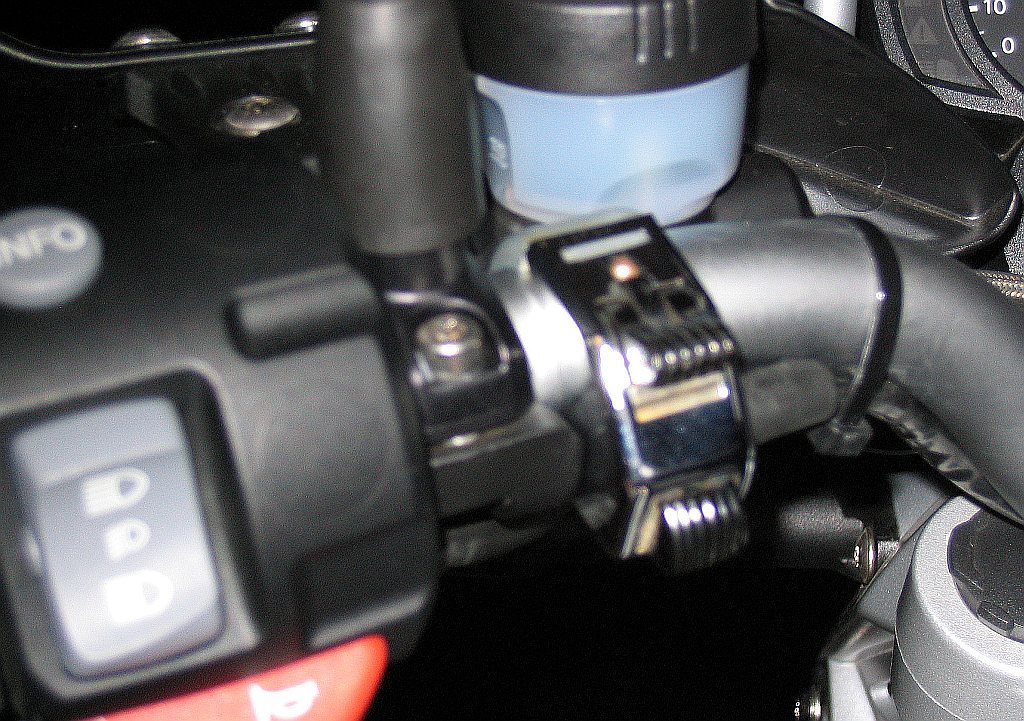
. Handlebar switch - leftover from an R50
Relay mounting Under the seat I made up my own wiring harness from the Hella harness that came with the relay - wrapping it in cloth friction tape similar to the tape BMW uses on their harnesses.
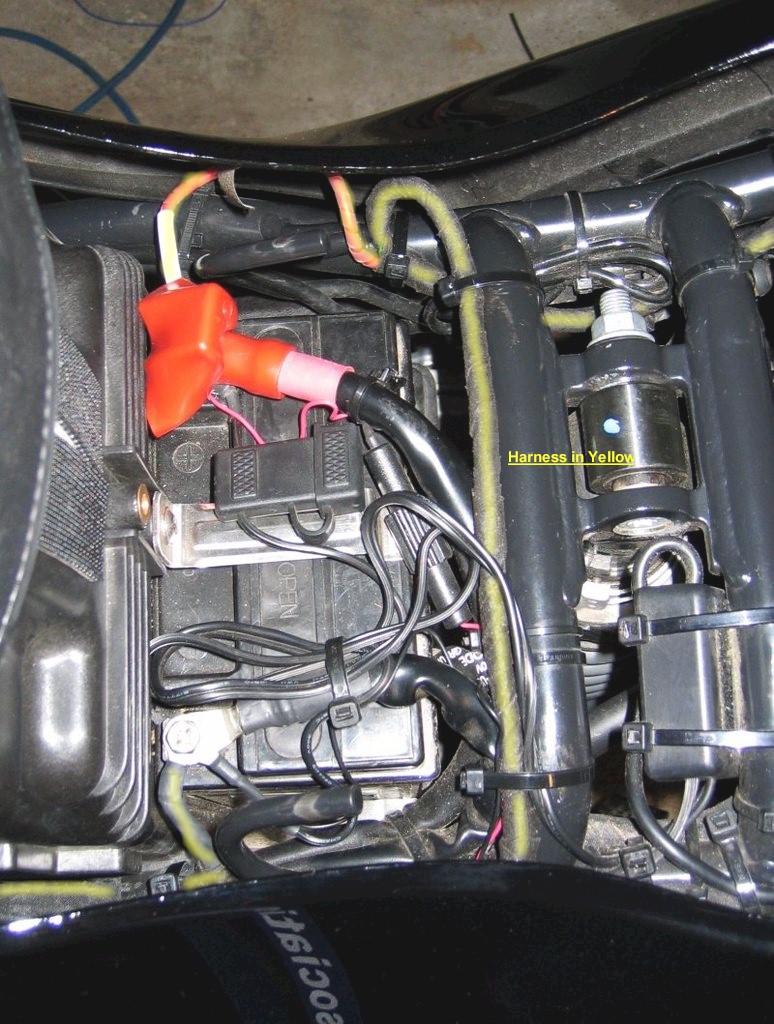
Harness hightlighted in yellow The test ride - the photos up near the top of the page show the results. My only worry is the lights may be too bright to use on back roads when there is oncoming traffic - I'm afraid of blinding the oncoming traffic. Still to be done - I want to come up with a better switch setup so the switch will be thumb-able without moving my hand off the grip - that should help with the blinding oncoming traffic problem. It appears that there may be space inside the left switch assembly where the ASC and EWS buttons go - I'm going to see if there is room there for a switch or a button. If I can put a button there - I can hookup the AutoSwitch that I've had for years and never got around to using. UPDATE - 09/06/08 - new switch installed. Link Here |
|
All ALL contents Copyright© 1998-2012 D. Eilenberger