 |
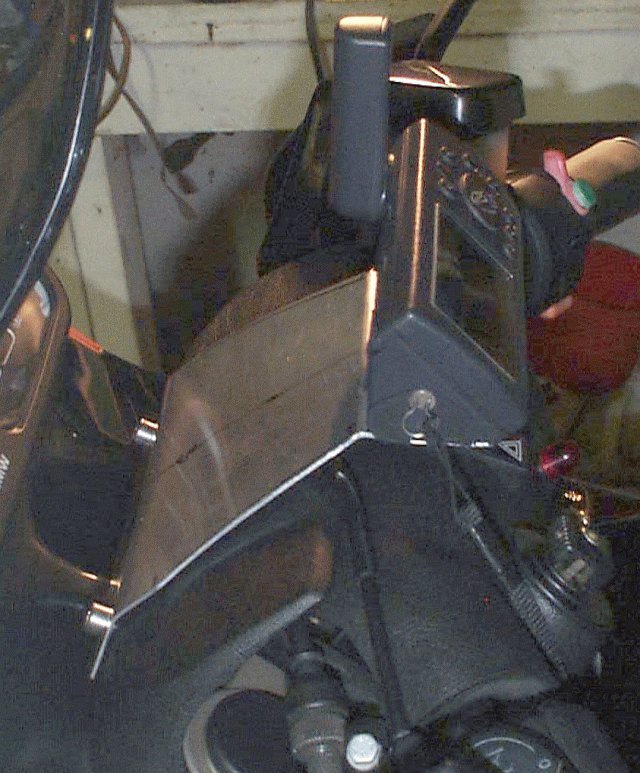
<-- Side view during initial fitting | 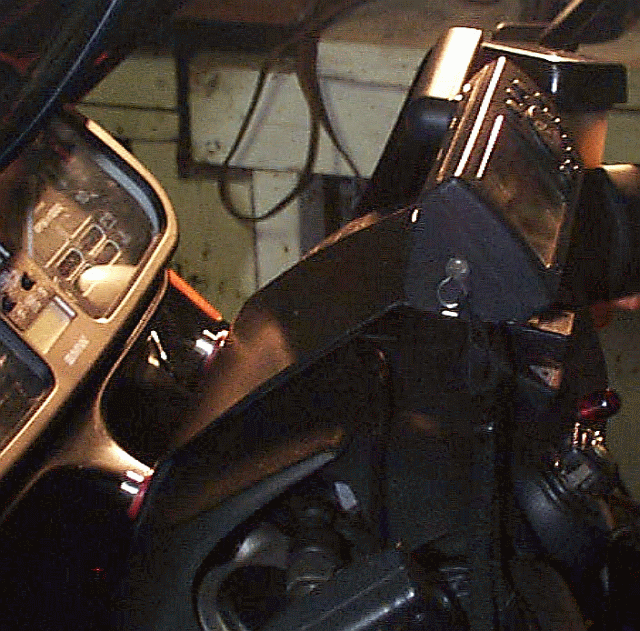 |
<-- Side view of finished product | 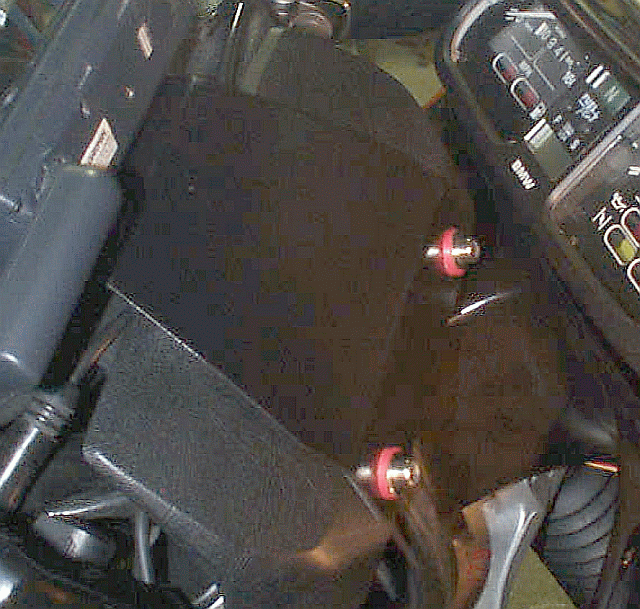 |
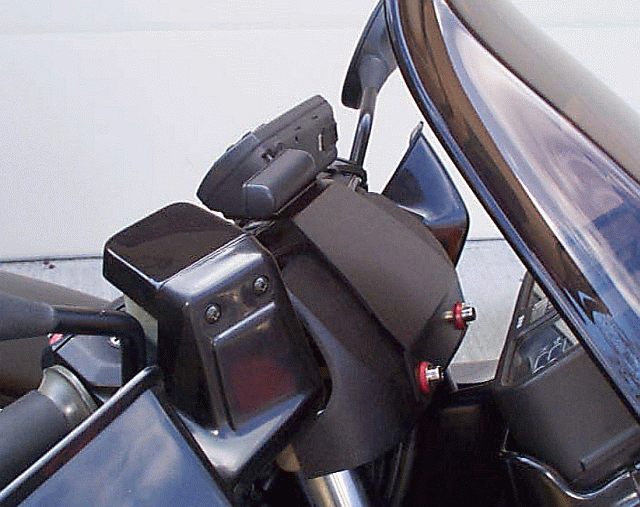
Mounting detail | ||
|
Finished on bike --> |
|
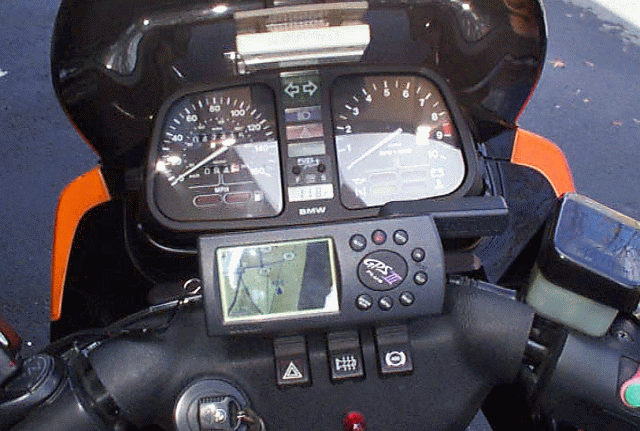
GPS off --> |
|
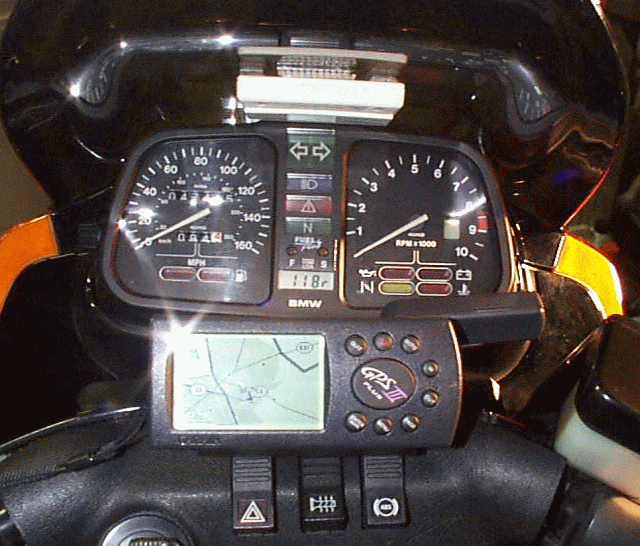
The finished product --> |
|
||
| Construction Details: | |||||||
|
|
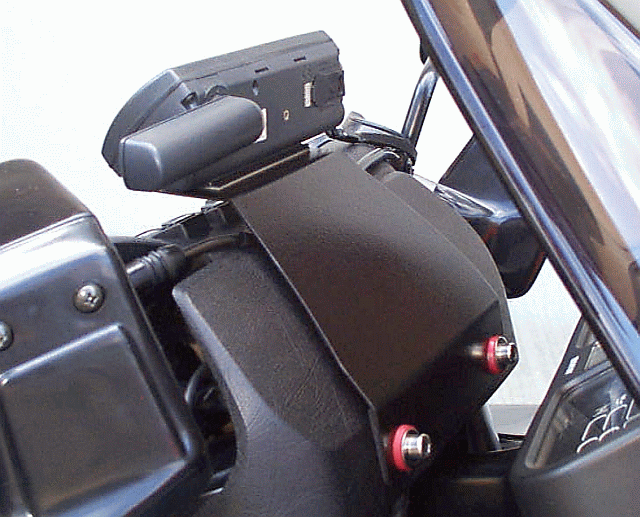
<-- Finished product |
|
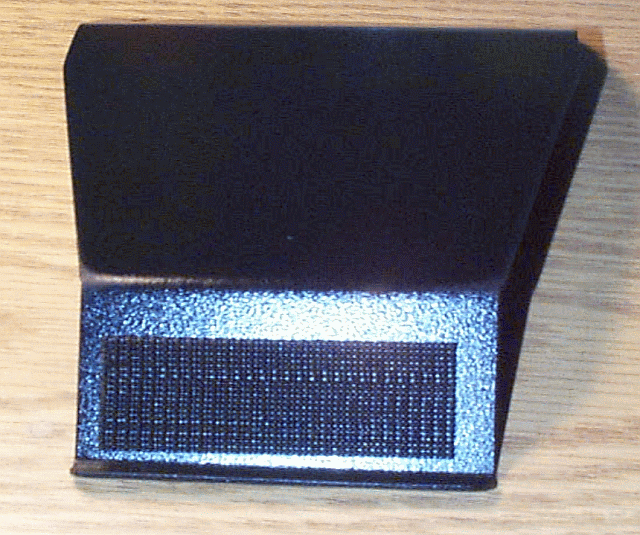
<-- Rear view with rubber in place |
|
<-- hook/hook fastener in place | ||
| Outdoor photos: | |||
|
|
<-- Side view |
|
<--Right side |
|
Mounting detail --> |
|
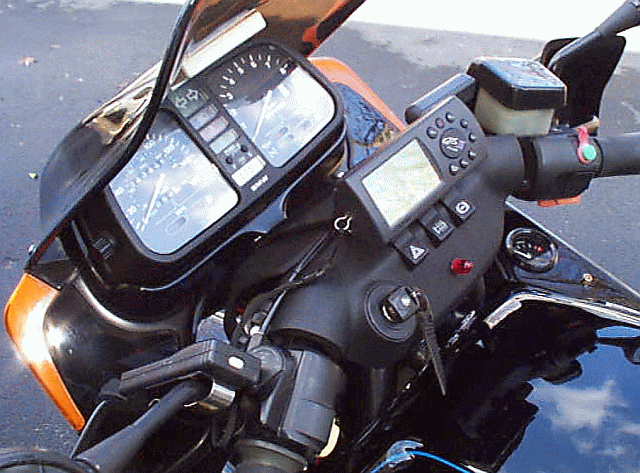
Rider view - daytime --> |
|
|
|
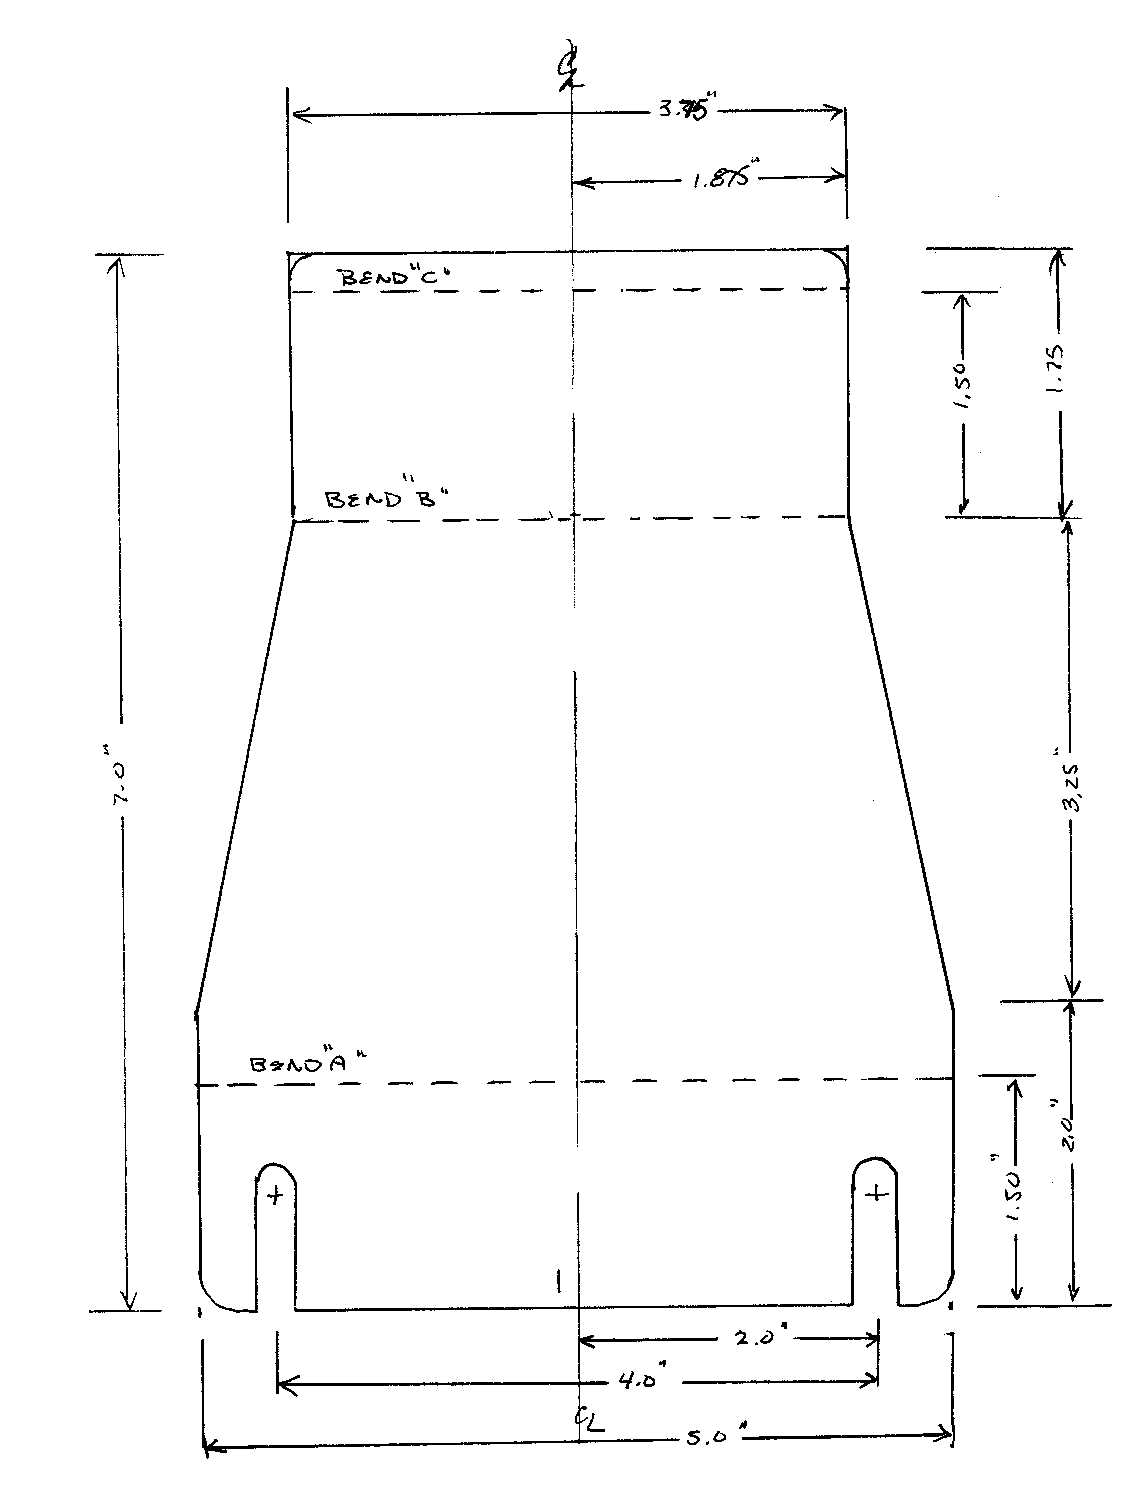
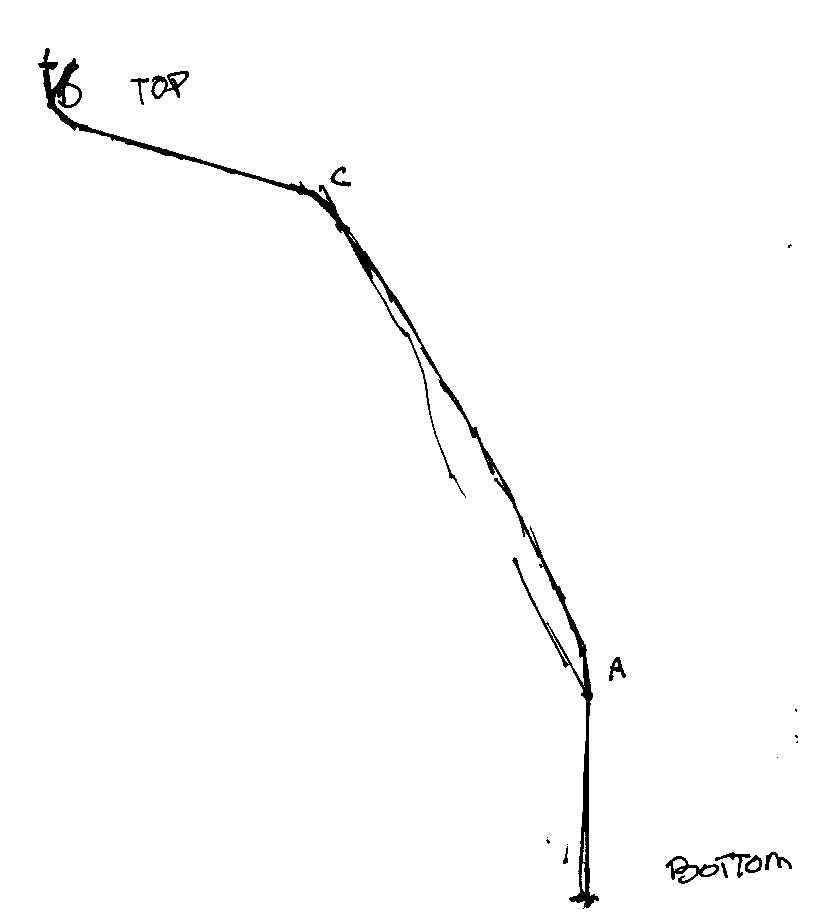
<--- template for mount |
|
<-- template for mount |
Click on any image to see the big version - and they're big..
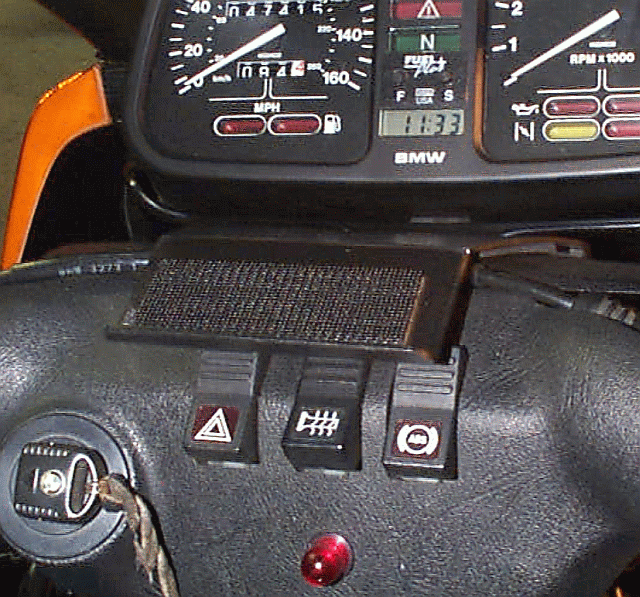
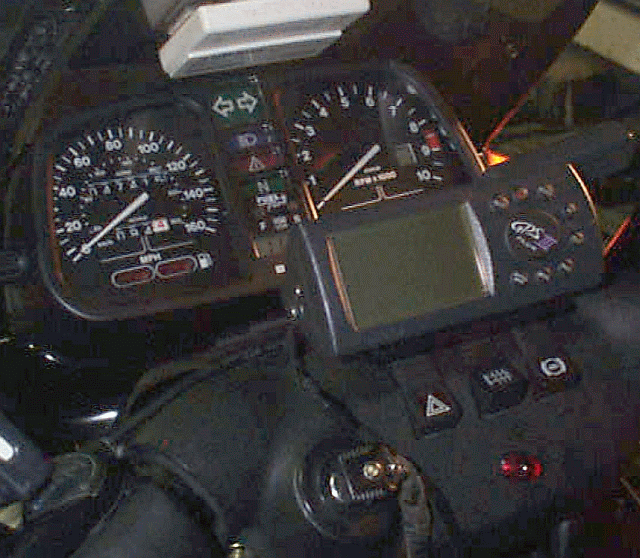
So - I decided that the Pharos/iPAQ GPS wouldn't work that well on the bike, and on the marketplace was a slightly used Garmin GPS-III+ at a bargain price. Couldn't pass up a bargain, so it was targeted for the bike.
Looked around for a sanitary mount (one that would look like it belonged on THE K75S) and didn't see anything that really looked "right" to me. Decided to make my own.
It took 3 days (about 5 hours total) to make it. It's made from some sheet aluminum, cut to mount on the front of the plastic bit that covers the front of the handlebar mounts. This plastic bit is held on with 2 allen screws, and given my not wanting to drill holes in THE K75S - I decided to use the existing bolt positions to hold a bracket.
I made a template from a file-folder (just the right thickness to be sturdy and yet easy to cut accurately) on one evening and took it to work the next day. At work - we have a small machine shop that I have the run of (we just got a milling machine!) - so I took the template, found some aluminum and went to work with the big sheer and a small corner-cutter sheer and a sheet metal bending brake.
The initial result can be seen in the upper left photo. At this point - a bit more bending to get exactly the shape I wanted (including a curve in the long part to match the curve of the plastic bit - and it was ready to take back to work for finishing.
At work today - I slotted the two mounting holes. This makes it REALLY easy to remove if I want to - I just loosen the allen bolts (which now have stainless washers and rubber washers under them) shown in the upper right photo, and it slides up. I can then just tighten the allen bolts to retain the plastic cover. Aside from the polished stainless bolt heads and washers, and the red rubber washers - you'd never know anything was different on the bike. Returning it to 'stock' just requires removing the stainless and rubber washers and screwing the bolts in further. I did have to use longer bolts - the stock ones weren't long enough for the purpose.
We luckily have a painter at work - who is also a rider (Harley, but he's a real rider who used to own a Harley shop) and he was doing 'splatter' paint today. He very nicely painted my mount - and it turned out super.
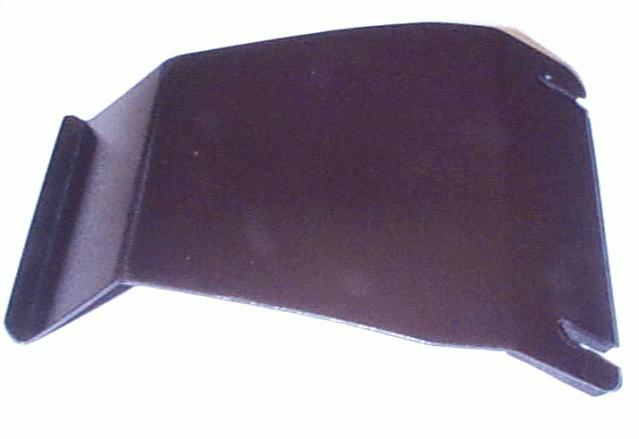
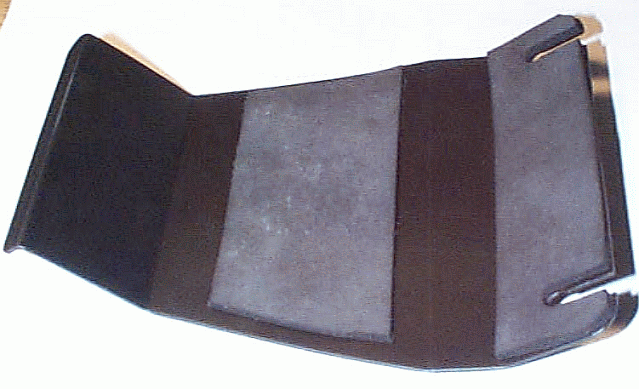
The bottom photos show some details of the mount off the bike - which will give you a better idea of the general shape (if anyone wants a template - email me). The center photo shows the high-density rubber tape I used to add a bit of vibration damping and flex to the mount. The right photo shows the mount with the Radio-Shack high-strength (10 lbs/sq/in) hook and hook mounting tape I used. Since I have 3 square inches of the tape - it is rated at 30lbs pull straight up - and 120lbs pull to the side. I don't think the Garmin is going to fall off. One of my goals here was to make it easy for ME to take the Garmin off since it can then be removed when stopping if traveling, not becoming an attractive target for theft. It does require a considerable tug to get it off, but this will allow me to put it in a 'stitch pocket when heading to the men room at rest stops. All that will be left can be can be seen in the middle photo of the middle row.
As a final step - I did a bit more bending of the mount - so the rubber tape seen in the rear photo rests firmly against the plastic panel on the bike. It doesn't appear like it will wobble or bounce at all - it feels very sturdy.
Heading out Sunday to give it a test ride.. it still needs bike power to it (should have the parts in a week or so..), and I will remember to put the tether around the left mirror stalk (it just reaches) as a just in case..
01/31/2003
Updated 06/24/03 (my birthday!):
Since some people have asked for a template - there are two in the bottom row. One is the outline of the metal as you would cut it, the other indicates the bends in the metal once it is cut out. Any decent sheet-metal shop could make one using these two templates. I used 1/16" aluminum. Questions - email me.
Update and Correction - the template of the mount has the correct dimensions on it - but the drawing shows the two slots too close together (I found this out when I used it to make a mount for a friend) - use the dimensions to get the correct spacing of the two slots!
Another update - I got a Garmin V for Christmas this year (it's good to order your own gifts - that way you know they'll fit) - and since it is identical in size to the III+ it went right on the mount.